Lower Body Strength and Flexibility - Yoga With Abi
Are you unable to ride because of a broken hand, fractured wrist or dislocated collarbone? Are you watching your muscles atrophy and your body tighten up? What if there was a way to maintain your core and lower body strength and maybe even improve your overall flexibility, while you’re healing from injury and waiting to get back on the bike?
In this article, I’ll show you a simple but comprehensive yoga routine that you can practice anytime—you don’t even need a mat—so that when you’re fully recovered and ready to ride again, you’ll be hitting the ground running!
I apologise that it has been such a long time since I last wrote—it’s been a busy year. But the good news is that I have tonnes of new material and lots more mtb-specific expertise to share with you. So if you’re open to incorporating yoga into your training, let me know how I can help to keep you pain-free and riding more competitively than ever.
HOW THIS YOGA SEQUENCE WORKS
As I mentioned, you don’t even need a mat for this one. You can do it every day if you feel like it and it really doesn’t matter at what time. It should take around 10-15 mins, depending on how long you spend in each of the poses. Drop me a message if you need any help with alignment/modifications.
There are a couple of different types of yoga poses that can keep you strong and flexible without putting any weight through your upper body. We can build strength in the legs, glutes and core in standing postures and work on flexibility in the lower back and hips in reclining poses.
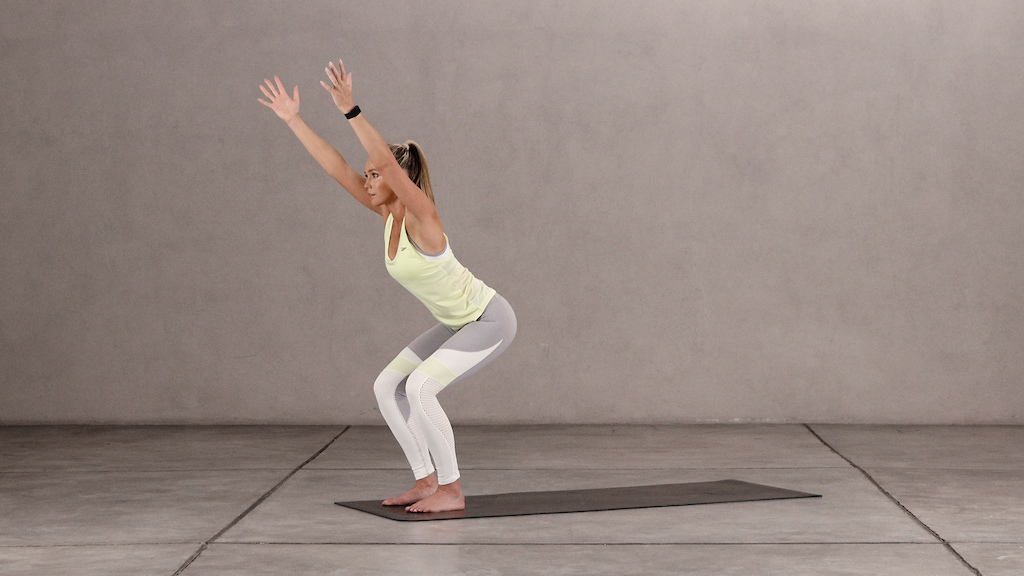
1. Chair Pose
To keep your legs strong. Stand with your feet hip-width apart, sweep your arms up by your ears or cross them over your chest and sit back in Chair pose. Check that you can still see your toes and draw your abs in to protect your lower back. Seal your lips and hold the pose for 3-5 slow diaphragmatic breaths. Repeat this pose 2-3 times—it should burn! And then come back up to standing.
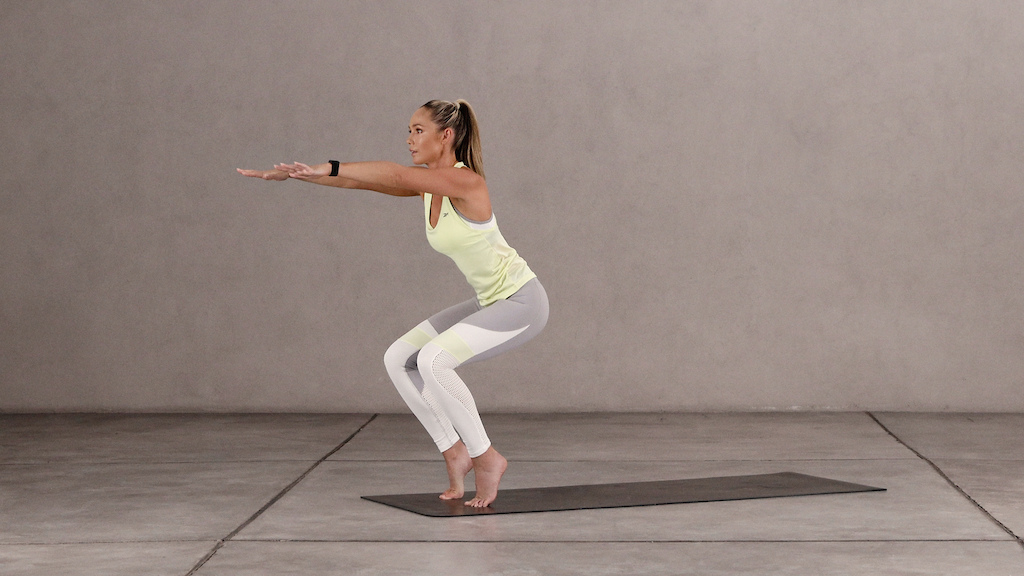
2. Awkward Pose
To challenge your balance. In Awkward pose, we take things up a notch. Bring your arms up in front of you at shoulder height or cross your hands over your chest, come up onto your tiptoes and lower your hips until your thighs are as close to parallel with the mat as you can handle. Hold for 3-5 slow breaths, in and out through your nose. Repeat 2-3 times if your quads can take it. And then come back up to standing.
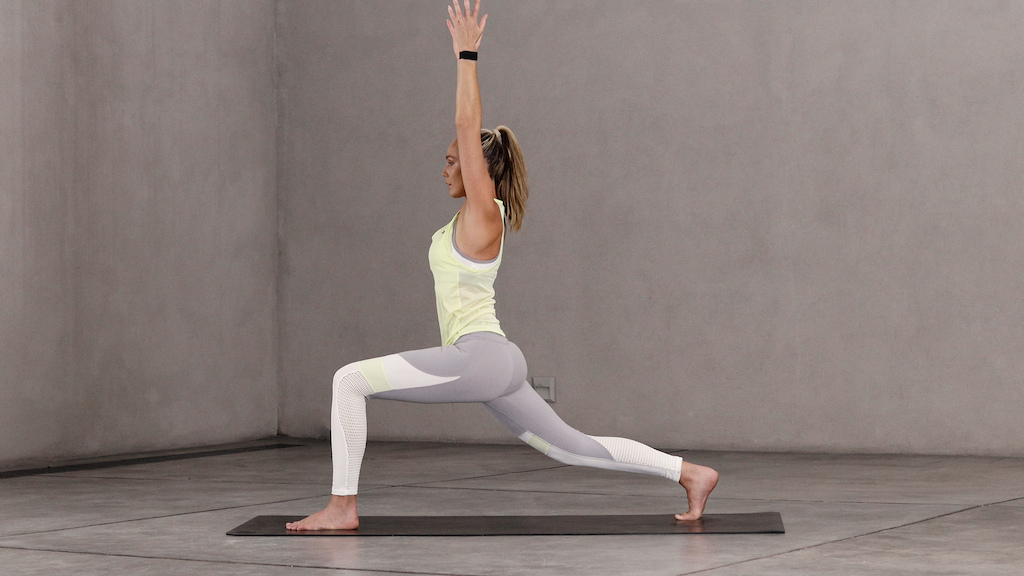
3. High Lunge
To actively stretch your hip flexors and hamstrings. Our final strength pose is High Lunge. The key here is to come up onto the ball of your back foot, stack your front knee on top of your ankle and draw your lower abs in. You can bring your arms up by your ears or cross your hands over your chest. Hold for 3-5 slow breaths on each side, bringing your front thigh as close to parallel with the mat as possible. Repeat 2-3 times on each side. And then come down onto the ground.
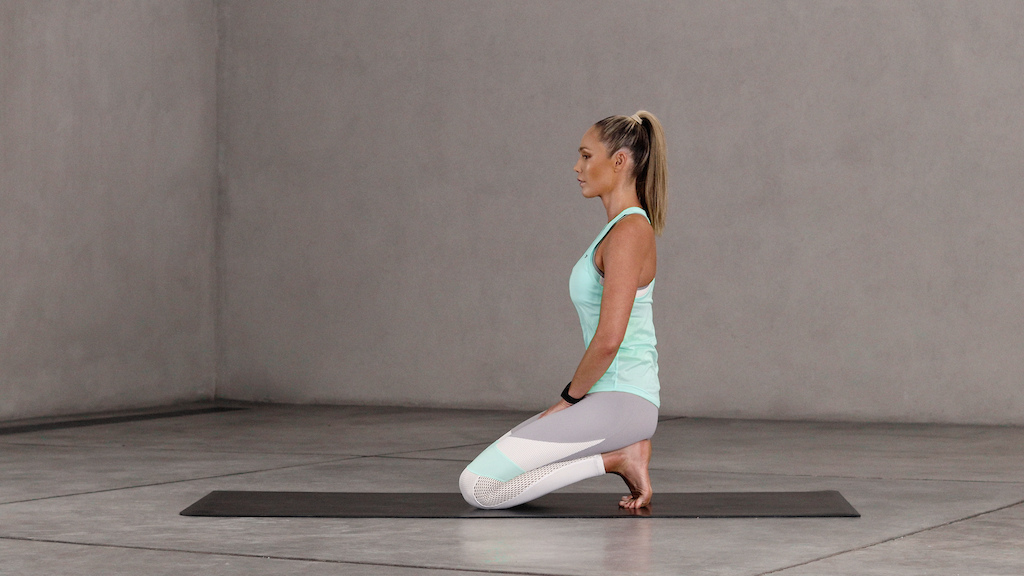
5. Screaming Toe
To show your feet some love. This pose can be excruciating but unless you’re also nursing a couple of broken toes, it’s very good for you. Tuck your toes under and sit back on your heels in Screaming Toe pose to stretch the soles of your feet. Try to line up your ears, shoulders and hips and hold for at least 3-5 breaths. And then come onto your hands and knees.
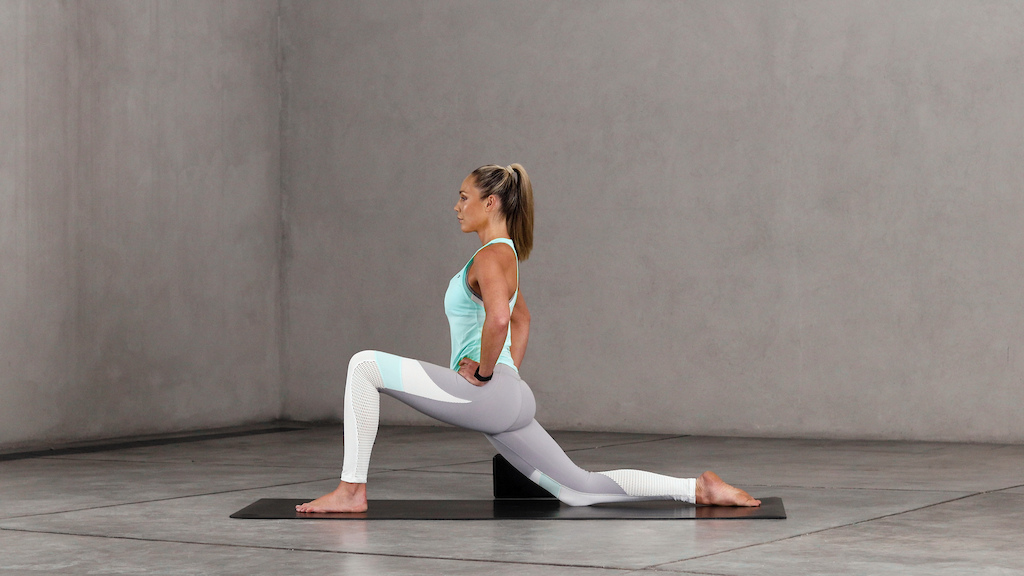
4. Low Lunge
To release tension in the hip flexors. Next, we’ll come into Low Lunge, to stretch the hip flexors. Again, check that your front knee does not come forward over your ankle and draw your lower abs in to protect your lower back. You can put a cushion under you back knee for support. Hold for 5-10 breaths on each side. The goal of this pose is to release tension in your hip flexors, so instead of forcing the stretch, try your best to relax into the pose. And then come to seated.
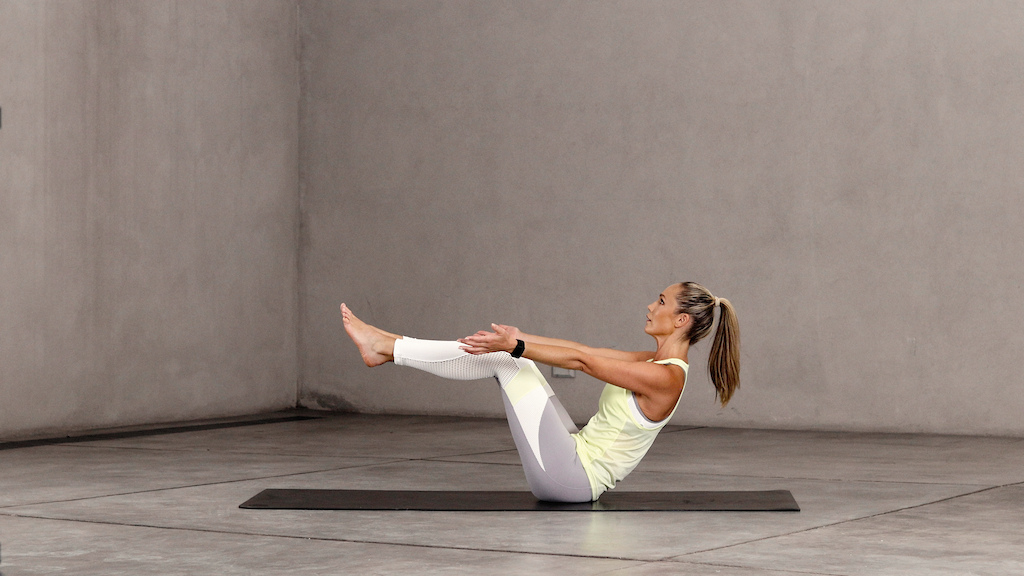
6. Boat
To strengthen your core. Our next pose is Boat—a core and lower back strengthener. Lift your feet up to eyeline, straighten your arms out in front of you or cross them over your chest and balance on your sitting bones, trying not to roll back onto your sacrum. The key with this pose is to keep your back straight—so lift your chest and draw your shoulder blades towards each other. Hold for 3-5 breaths. You can also lift and lower between High and Low Boat 5-10 times to increase the intensity. And finally…lie down on your back.
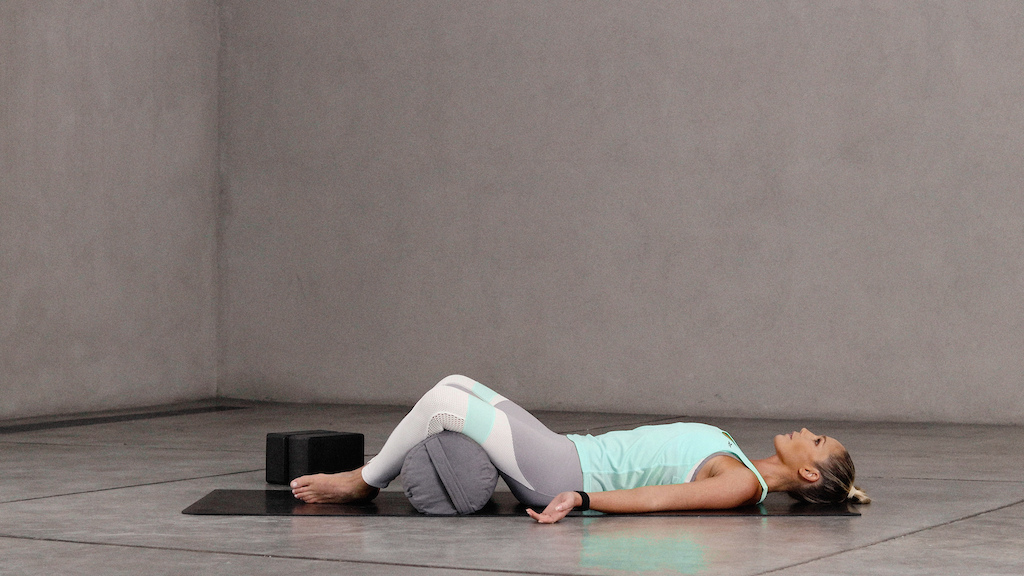
7. Reclining Butterfly
To stretch your groin and adductors. Let’s come into Reclining Butterfly to release tension from the insides of your thighs. Bring your feet together and let your knees fall open in the shape of a diamond. You can put a pillow under your knees for support. Hold for up to 10 breaths, relaxing as deeply as you can into the pose.
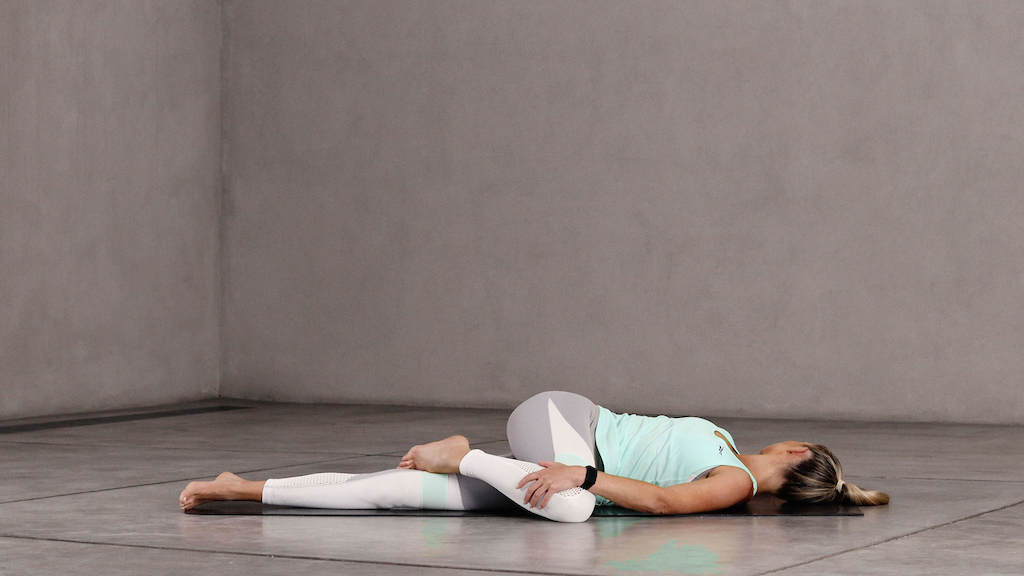
8. Reclining Spinal Twist
To release tension at your lower back. We’ll finish in Reclining Spinal Twist, to release tension at your lower back and stretch your abs, obliques, glutes and the outsides of your hips. Relax into the pose for up to 10 breaths on each side.
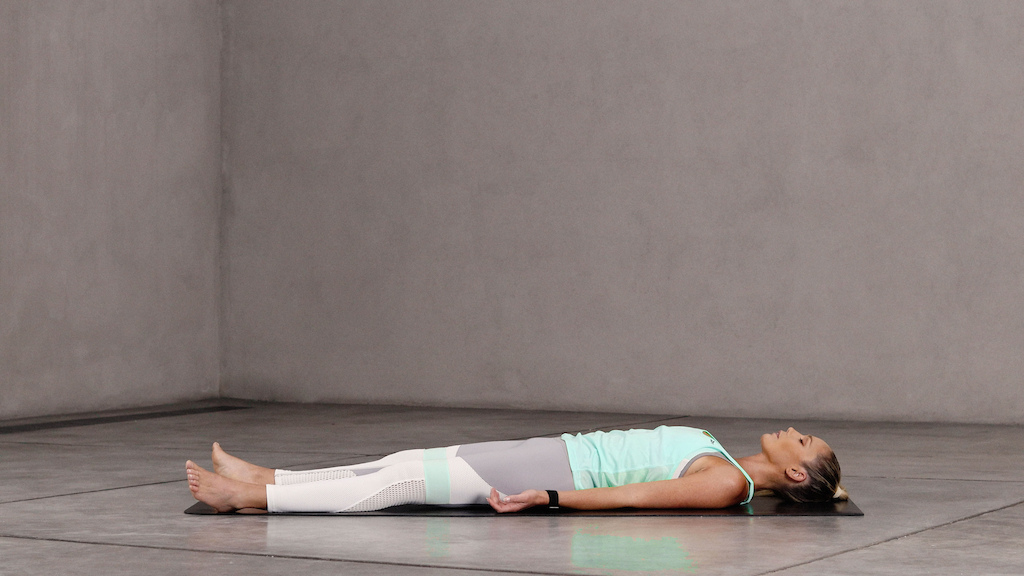
Final Resting Pose
Rest for a few minutes. If you have time, spend a couple of minutes in Final Resting Pose to allow the benefits of the poses to sink in. Close your eyes and follow the gentle rising and falling of your breath at your belly and your chest.
Repeat this strength and flexibility sequence 3-5 times a week, to support your recovery and lose as little ground as possible while you're waiting to get back on the bike.
I have recently launched a new site www.yoga15.com, where you can find in-depth tutorials for these poses and all your favourite factory yoga videos! I have also put together brand new COURSES to cover different aspects of your training, so you can take a look at those too if you’re interested.
Author Info:
Must Read This Week

There’s opinion out there that says making “red-line” efforts when you’re older as being a bad idea. If you can limit your efforts to 70 - 80% of your maximum, you’ll just physically hold together longer, staying fit from the movements, rather than just hanging the idea of “fitness” on sheer effort.
Yoga for me is actually an extension of this, as it isn’t about all out effort, but instead a controlled effort, using good technique and trying to stay in a “zone”, rather than just burying myself in full on discomfort as a way to “fitness”.
Some of the newer superlight ebike options are starting to catch my eye, just need the pricing to come down otherwise my wife will be the one having a heart attack when the bill comes in.
Did she accidentally unlock the hidden comments one day?
really help me to staying on my bike
world of difference.
Thanks for the great content, my wife loves it! And it seems that my friend is having a crush on you
I wonder if there are any researches, studies, or event opinions on how yoga will help to protect you against traumas like you can get riding extreme disciplines in mountain biking?
My vision of this is: the force and speed of impact on your body during a fall are so huge(broken bones, torn big ligaments - ACL and etc.) that yoga trained body/muscles can't (in my opinion, I may be wrong) provide needed 'protection'.
I think that exercises that rehab doctors make you do during your last stage of rehab plus sports-related training in the gym(let's say 'functional training' focused on loads that your sport do to your body, common injures in your sport that you want to prevent) can do better?
Where I am wrong?
I am not trying to be rude or say that yoga is useless - it is definitely not. I want to get to know your vision on that question, Abi.
Thank you!
When I'm older I'm definitely buying one
Can we have videos?
My focus is basically in Neck region, and general flexibility (as some say... age can be seen by the lack of flexibilty)
Now can you teach us how to NOT crash and hurt ourselves?